
Hey lionhearts!
Welcome back to part two of a series of posts on advanced shading. In last weeks post, I discussed some of the basics to get you started before we dive in. So we’re just going to get straight to the fun stuff. No brakes, full speed ahead.
Today, we will be talking about a method of shading in charcoal that I really love. I call it the “wipe-off” method.
I like it because, first of all, it’s extremely messy and freeing, and the warm softness of charcoal is just so aesthetic, and isn’t that what art is all about?? An added plus is how quick it makes the shading process. Rather than spending tedious time perfecting one area at a time (we’ll go more into THAT in the next post 😉), we’re working on the entire drawing in several layers.
The drawing I did to demonstrate the process in this post took me a little over two days. If I was going to try to do the same drawing in graphite it would probably take a little over two weeks. (For the record, I’m not trying to bash graphite. There is a time and place for two week drawings.)
To get started, I’m working on Bristol’s vellum surface paper (not to be confused with Bristol’s smooth surface paper). It’s very durable, and has a bit of texture, but it’s very soft, and can withstand lots of layering and paper towel scrubbing and erasing.
And the tools I used to create the drawing:
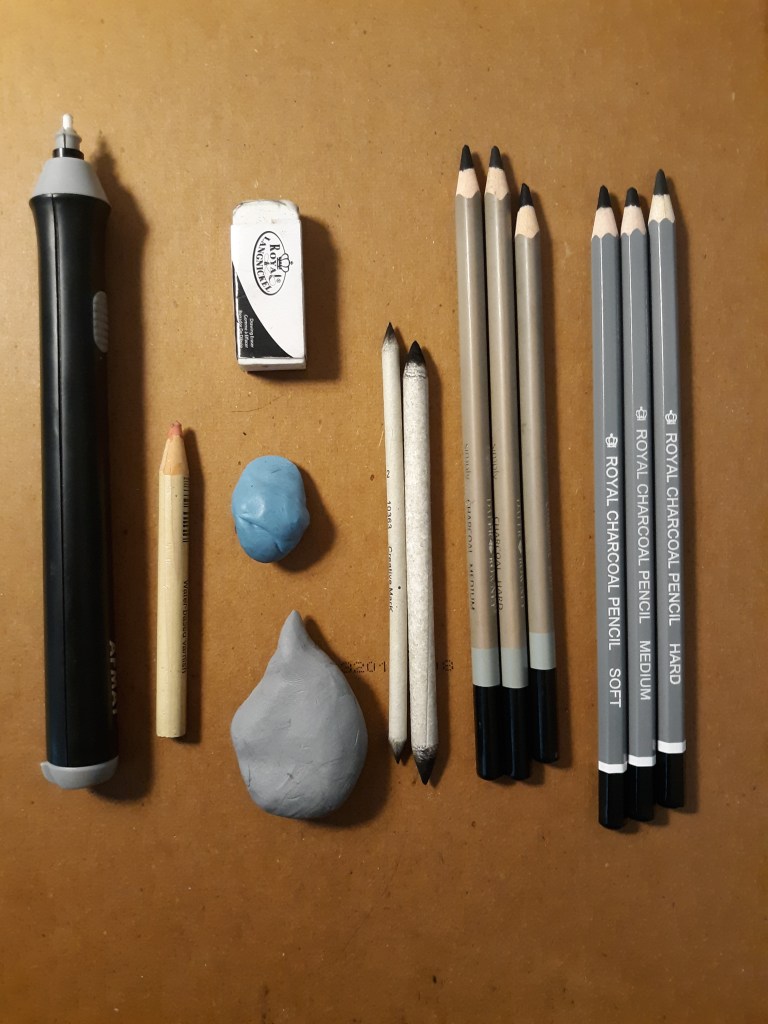
AFMAT Electric Eraser; Faber-Castell pencil eraser; Royal block eraser and kneaded eraser; Faber-Castell kneaded eraser; a couple blending stumps; Daler-Rowney, and Royal charcoal pencils, which come in sets of hard, medium, and soft. If you’re following along, you’ll also need a paper towel.
And finally the last thing we need: Reference. You can draw from life. You can draw from a photo. You can even draw from someone else’s drawing. But you cannot neglect reference.
For this demonstration, I’ll be using this still of Luke Skywalker.
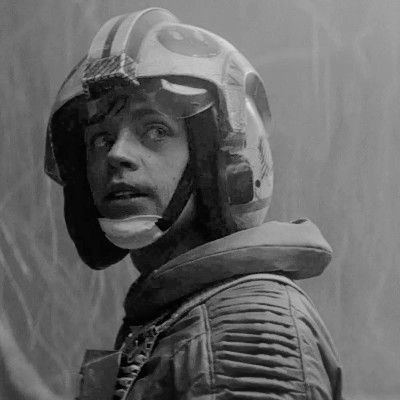
Since this is a sort of grainy picture, and you can’t really see every single detail, I thought it would work well with the ambient quality of this shading/blending method.
If you were creating a hyper-realistic drawing, you’d definitely want to look for a photograph with higher definition. But this method is definitely more painterly, so we don’t have to worry about that as much.
Now let’s get to the drawing.
Day 1
I started out with the Royal medium charcoal pencil, just sketching out the basic shapes, and measuring out where I need to place the facial features. I try to be very careful with this step, because it’s going to be the foundation of the rest of the drawing, and if I don’t get it right, it will throw off the entire drawing.
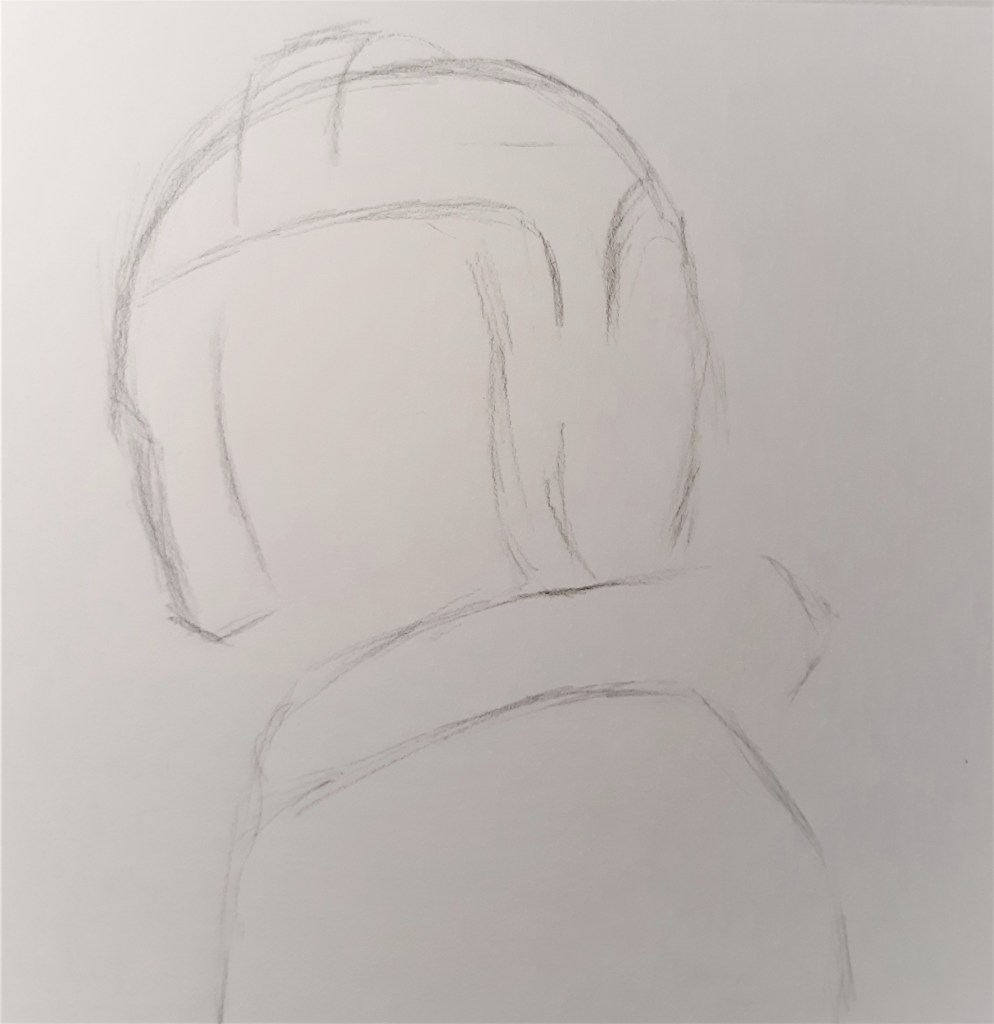
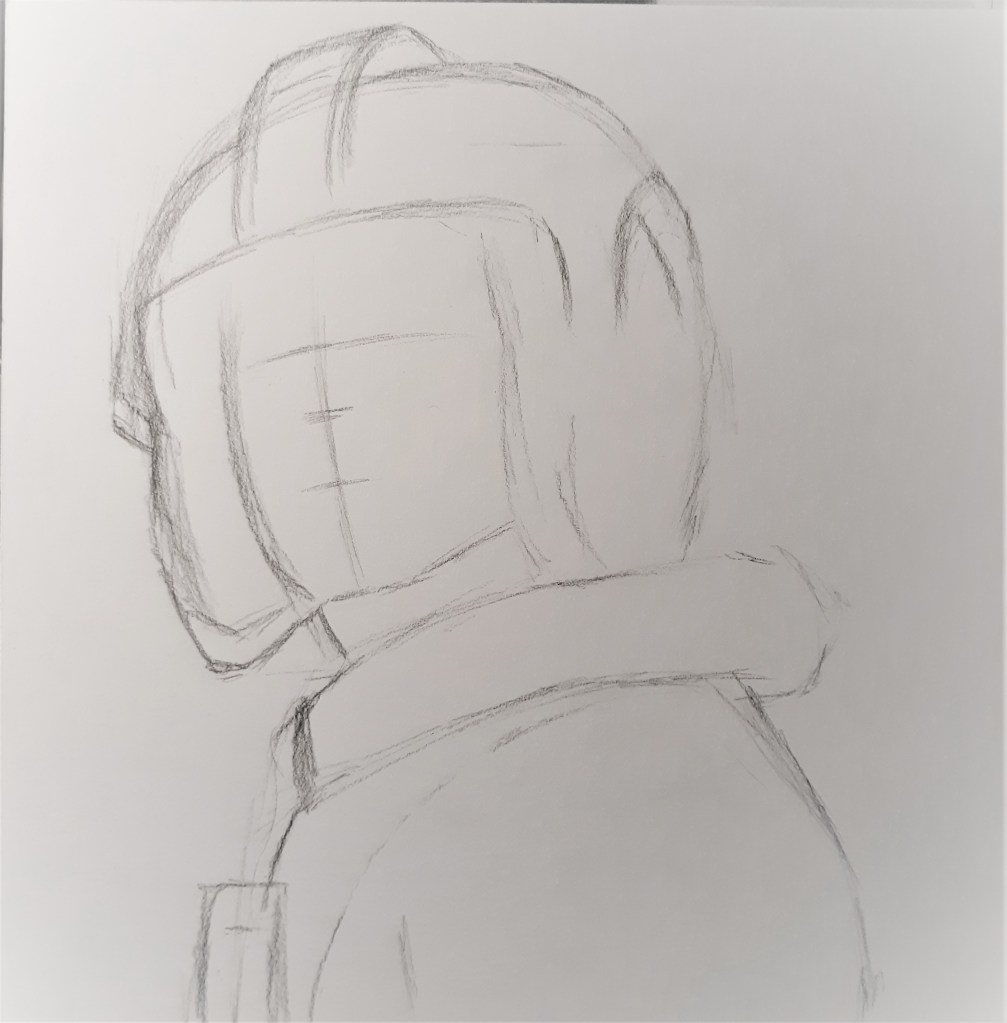
In hindsight, I probably should have been more careful. The shape of the helmet here is a little wonky, so I had to fix that later. Ahh, you live and learn. 😛
Next—still using the medium charcoal—I block in the features and some basic shading. I’m trying to be careful about where I place things, but I’m not too stressed about making it perfect. I know I’ll be refining things in the following layers.
There’s a very delicate balance between being free to make mistakes because this is just the bottom layer—and knowing that THIS IS THE BASE LAYER, and anything you mess up here you will have to go back and fix later. You want to get it right while it’s easy to fix. I use some of the methods that I talk about in my outline post to make sure everything is accurate. But overall it’s a very free-flowing process.
And now comes my favorite part. Grab a paper towel like so:
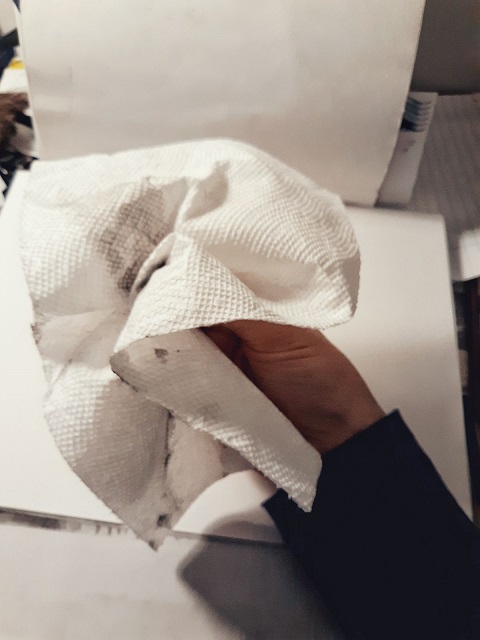
and just scrub it over the entire sketch. Some people call this “wiping the drawing off.” Although… technically the drawing is still there. So I feel like there should be a different name for this step. Anyway…

Now that we’ve proverbially “wiped off the drawing…”
…we get to draw it again.
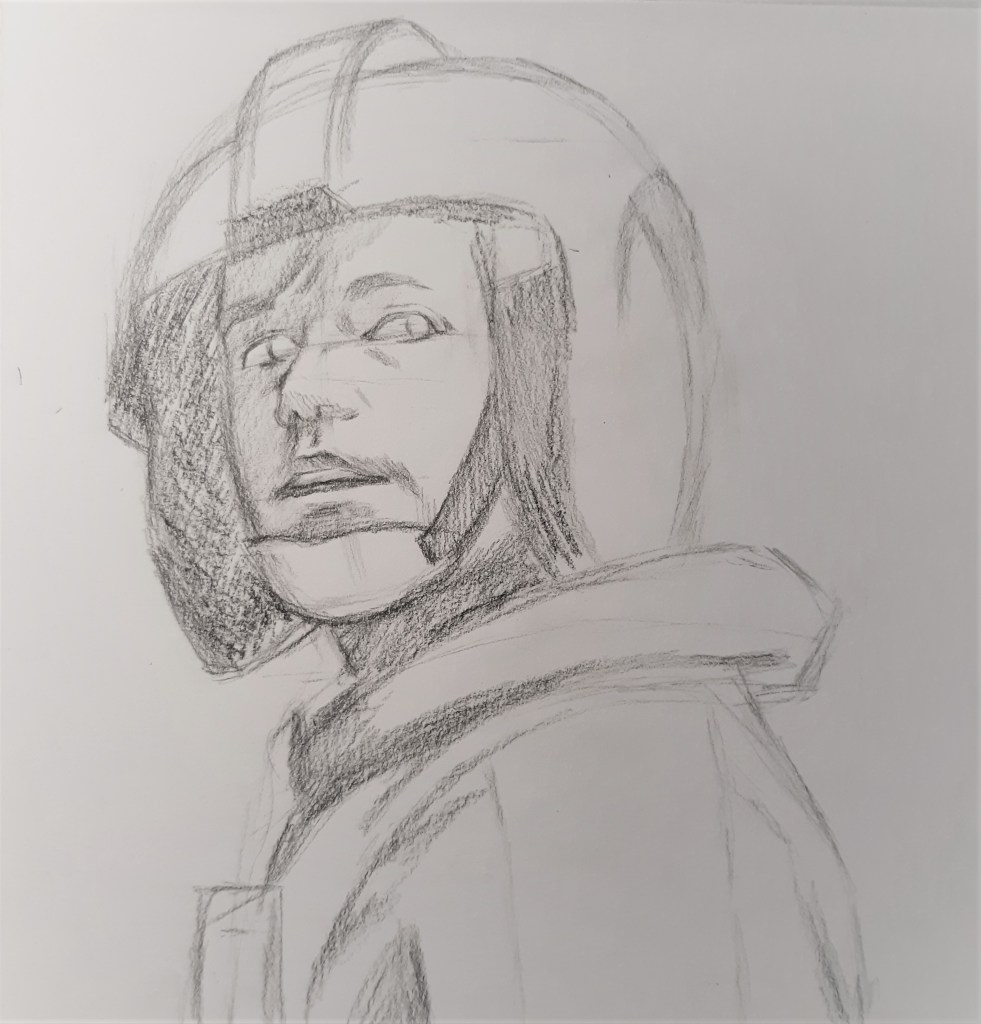
This time we’re going to refine our base sketch, and add more details and shading. I’m still using the Royal medium pencil here, as well as the Royal soft pencil for the darker areas.
This is the perfect time to look at your drawing, and fix anything that you messed up in the first pass. In my drawing, I noticed that I made the helmet too wide, and the nose a touch too low. So I made those adjustments with my block eraser and electric eraser, and then re-sketched them in.
Then I pulled out the old paper towel and wiped that layer off too. I have way too much fun with this part. 😛
Check out that ambiance. *chef’s kiss*
For this next layer, I got out my Daler-Rowney pencils, which are probably my favorite charcoal pencils. They’re extremely soft (so much so that the soft pencil has broken every time I’ve tried to sharpen it 😭), but I love them.
I worked with the medium, soft, and hard pencils, getting all the details and shading that I hadn’t done yet. Each layer is becoming more and more refined, and this layer was so satisfying. Maybe it was how the soft pencils blended so smoothly with the toned paper. I just had a lot of fun with it. I almost didn’t want to wipe it off.
But alas, I decided to do it anyway. It was for the greater good, after all.
I was not prepared for how messy this layer would be. But hey. We’re artists. We’re not afraid of messes.
We’ve introduced our dark tones with the soft charcoal, and the broad paper towel blending has given us our midtones.
It is now time to wield our erasers, and bring back the highlights.
I love this part of the drawing, because it really starts to give the drawing dimension, and bring it to life.
I took up my pencil eraser to put in the sharpest highlights first. Then I pinched my kneaded eraser into a sort of flat brush shape to gently lift out the softer highlights. With my block eraser I can erase the larger sections, and then I used the electric eraser to touch up any stubborn spots, and to erase the especially bright, thin highlights.

This part of the drawing reminds me of that painting technique where you lay down a wash of paint on your canvas and then use a cloth to wipe away your highlights. Actually this whole method feels very much like creating a painting. Which might be why I like it so much. It gives you freedom from getting lost in the details, and helps you see the drawing as a whole throughout the process.
I suppose you could call this your finished underpainting.
From here, we’re going to start working on the details, and putting back in the dark tones that we wiped off so many times. So it’s time to set aside our dear paper towel, and instead employ the blending stumps.
This is definitely the longer part of the drawing, but it takes less time than if you were starting with the details from scratch. Just keep refining, and layering, and building up your tones.
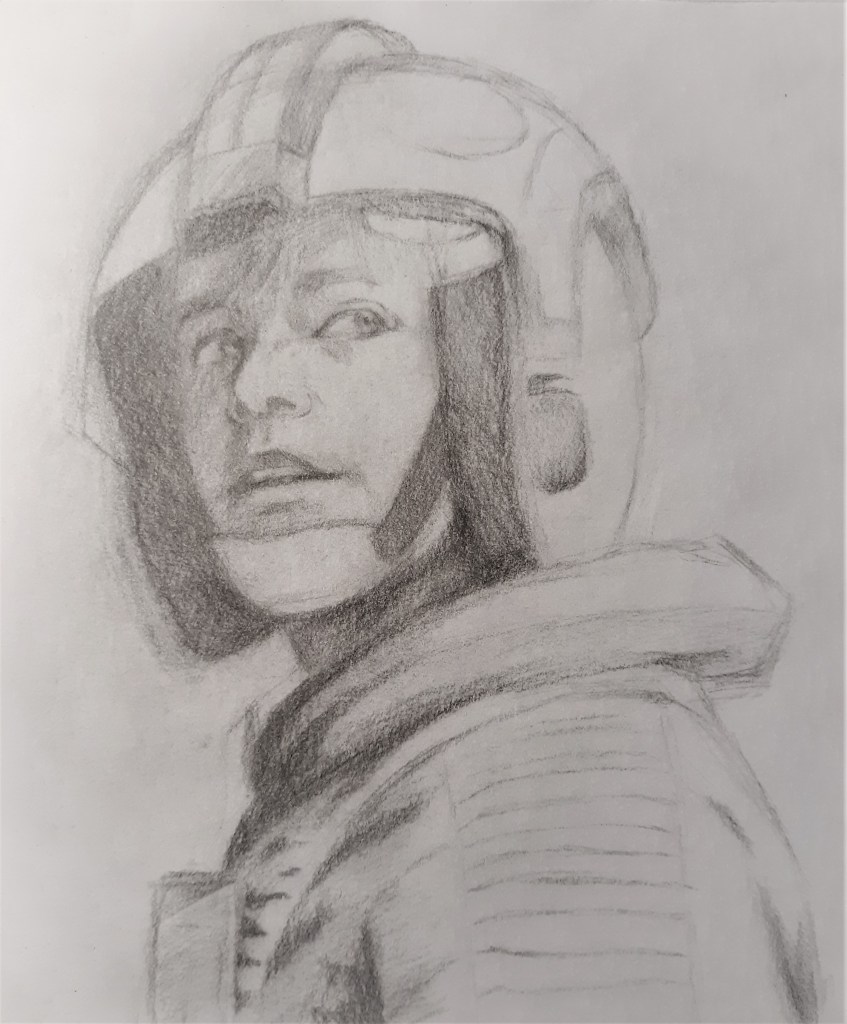
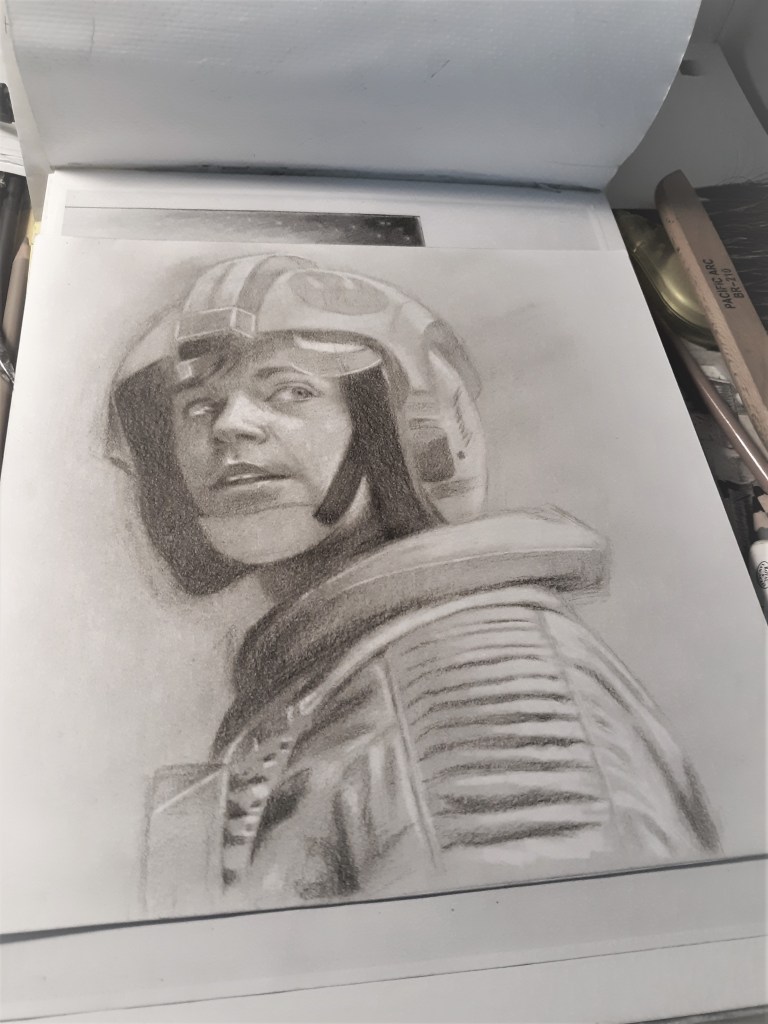
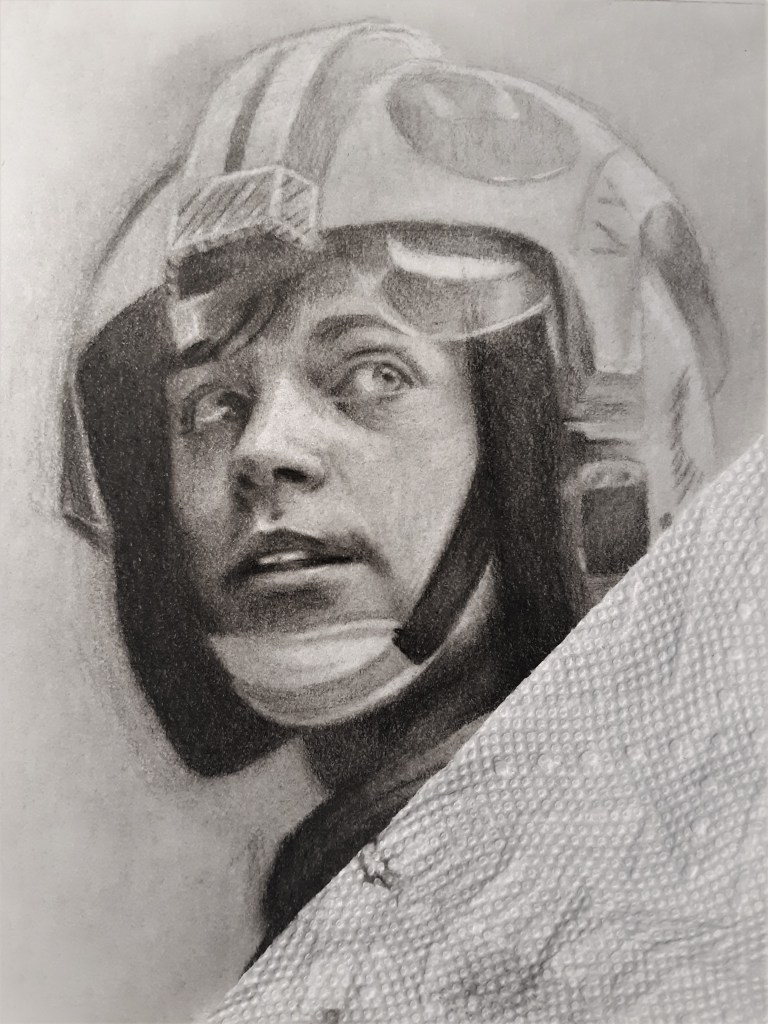
I was able to get the face and helmet mostly finished in the first day.
Day 2
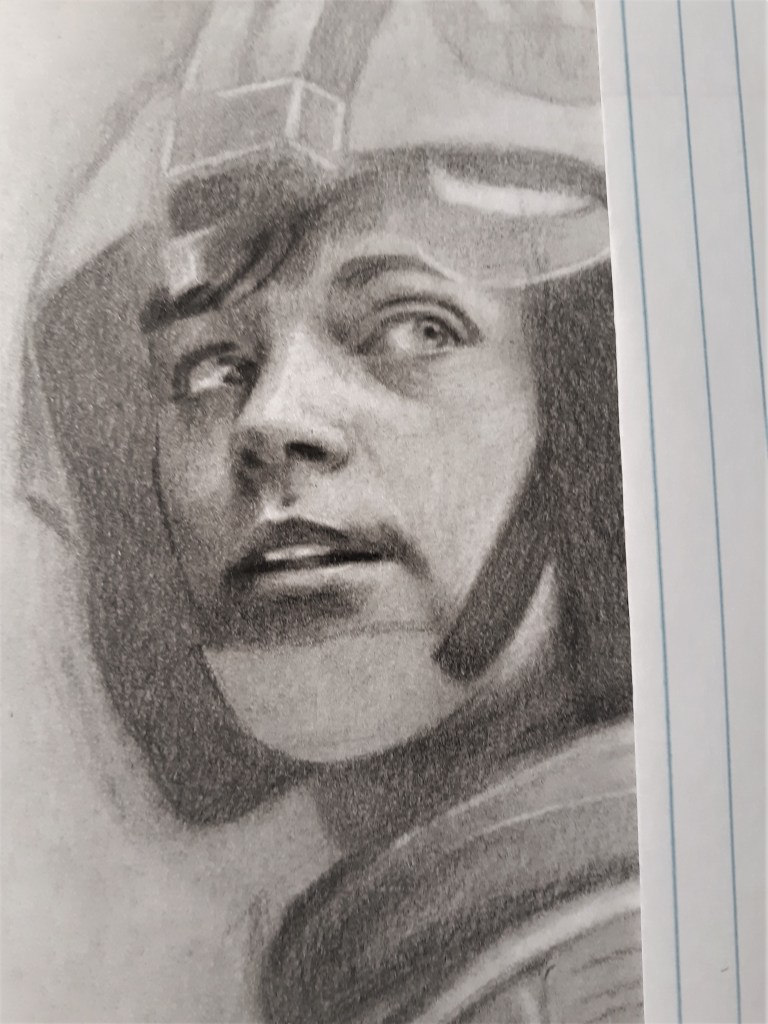
The next morning I came back to it with fresh eyes, and realized straight away that something was wrong with his eyes.
It’s subtle, but it’s there and it’s wrong.
At first I thought I had drawn the right eye too big, and I was going to have to erase and redraw an entire eye. I tried to rationalize that maybe it wasn’t too big of a deal, and I could just leave it. Because by now, I’m rather tired of having to redraw eyes.
But no. I was giving this my best. And if that meant completely erasing and redrawing eyes… then so be it!
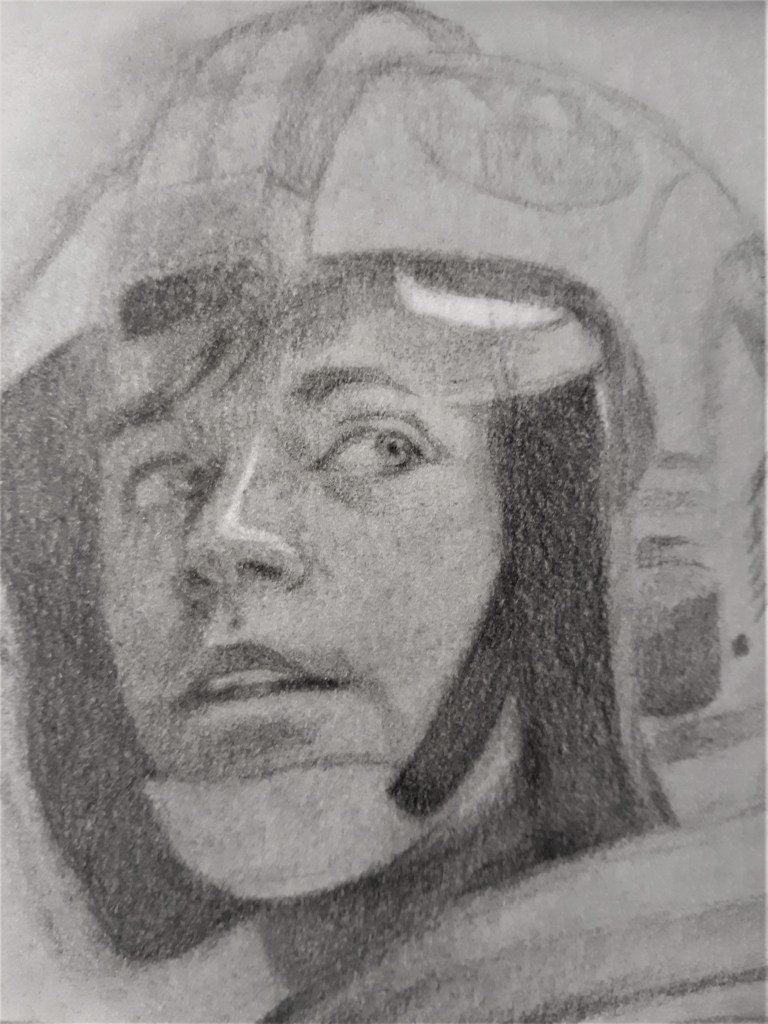
Thankfully, after further review of the reference photo, I realized the problem lay not in the right eye being too big, but in the left eye being too small. Which is a relatively easier problem to fix.
Electric eraser, it’s your time to shine.
All I had to do was erase the top of the eye, and expand/reshape it a bit. Yes, things will look very awkward for a little bit. That’s okay. Just bear with it, and keep layering and blending.
That’s better.
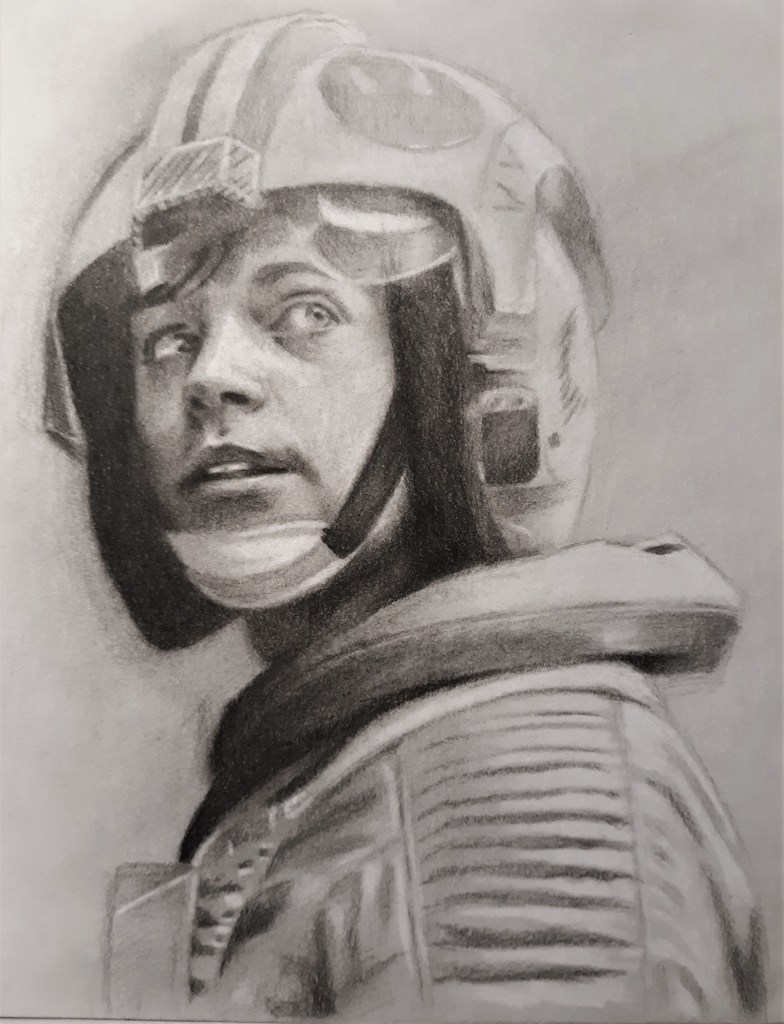
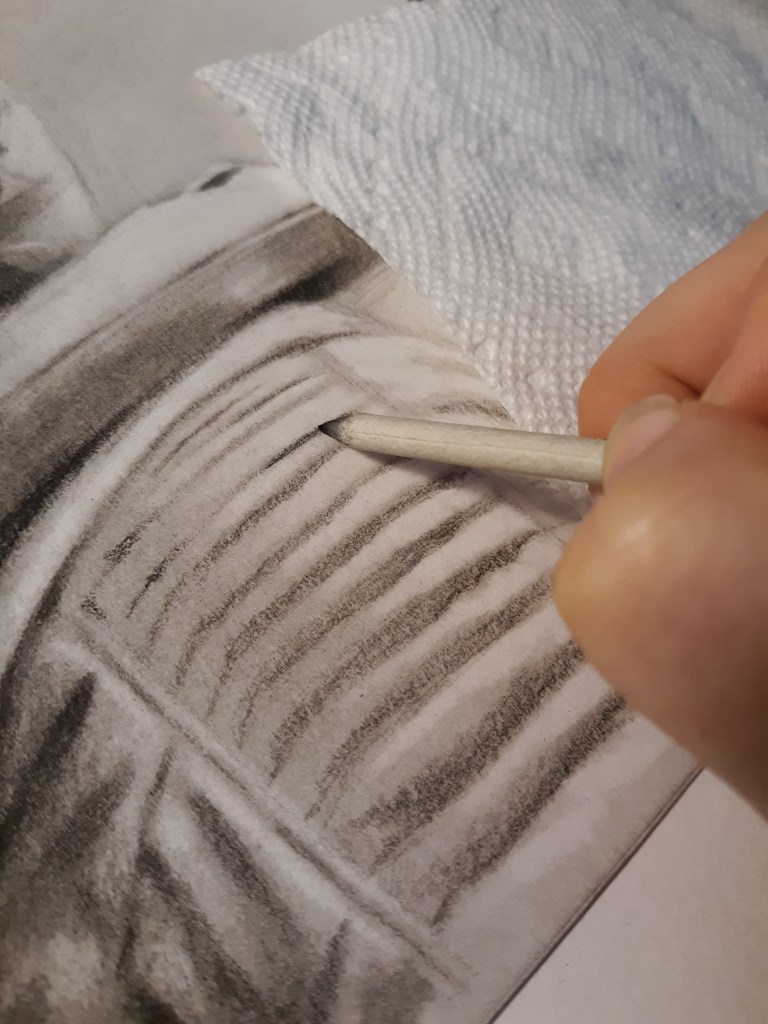
After I fixed that, it was on to the rest of the portrait. Namely, the suit. This was both easier than the face, because I didn’t have to worry about getting everything exactly accurate; and harder, because I find the texture of clothing to be a little more challenging. But it’s a fun challenge.
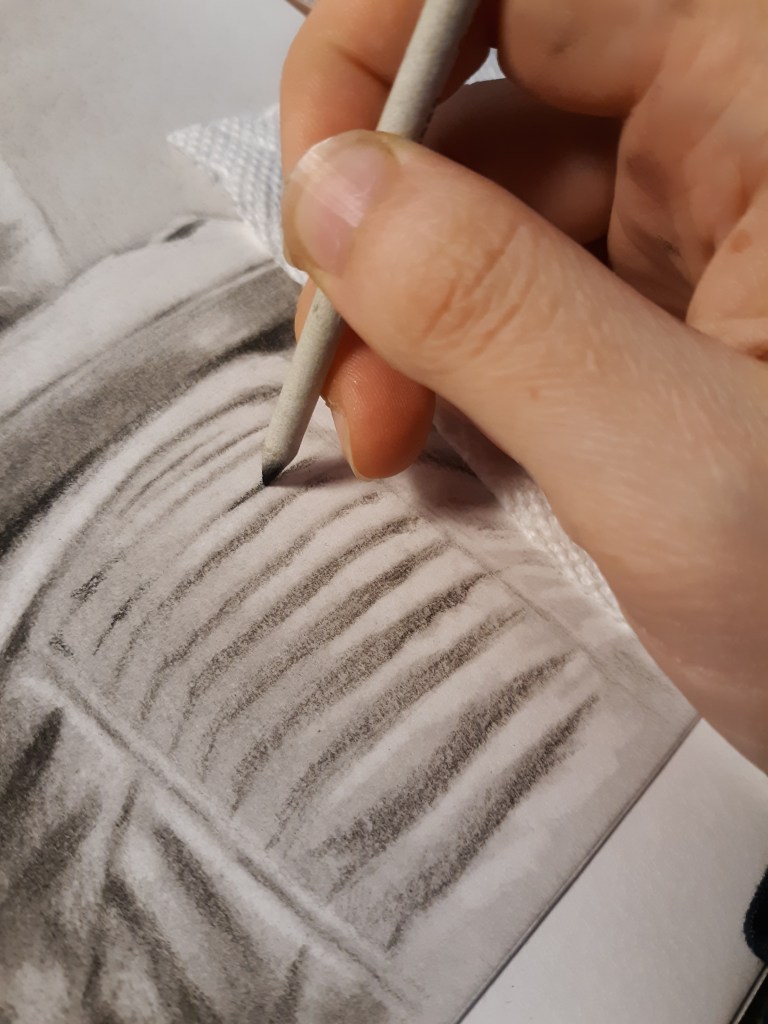
Okay, so I know they always say, “DON’T USE THE TIP OF YOUR STUMP FOR BLENDING!!” (And, granted… I am one of the people who says that.) But I realized with this drawing… I kinda use the tip of the stump for blending sometimes. Heh heh. *avoids eye contact*
But, after thinking about it, I’ve discovered there is a correct and incorrect way to use “the tip.” Behold:
I also made a graphic, since my pictures weren’t super clear:
(This is why I do portraits and not graphic design.)
The point is you’re still sort of using the side of the tool, and not the actual tip.
Anyway, just wanted to interrupt the process to let you know it’s actually okay to use the tip for blending. I use it quite a bit for blending thin lines. So in conclusion to this interruption, listen to the rules, kids, but also find ways to break them too.
Alright, back to the drawing.
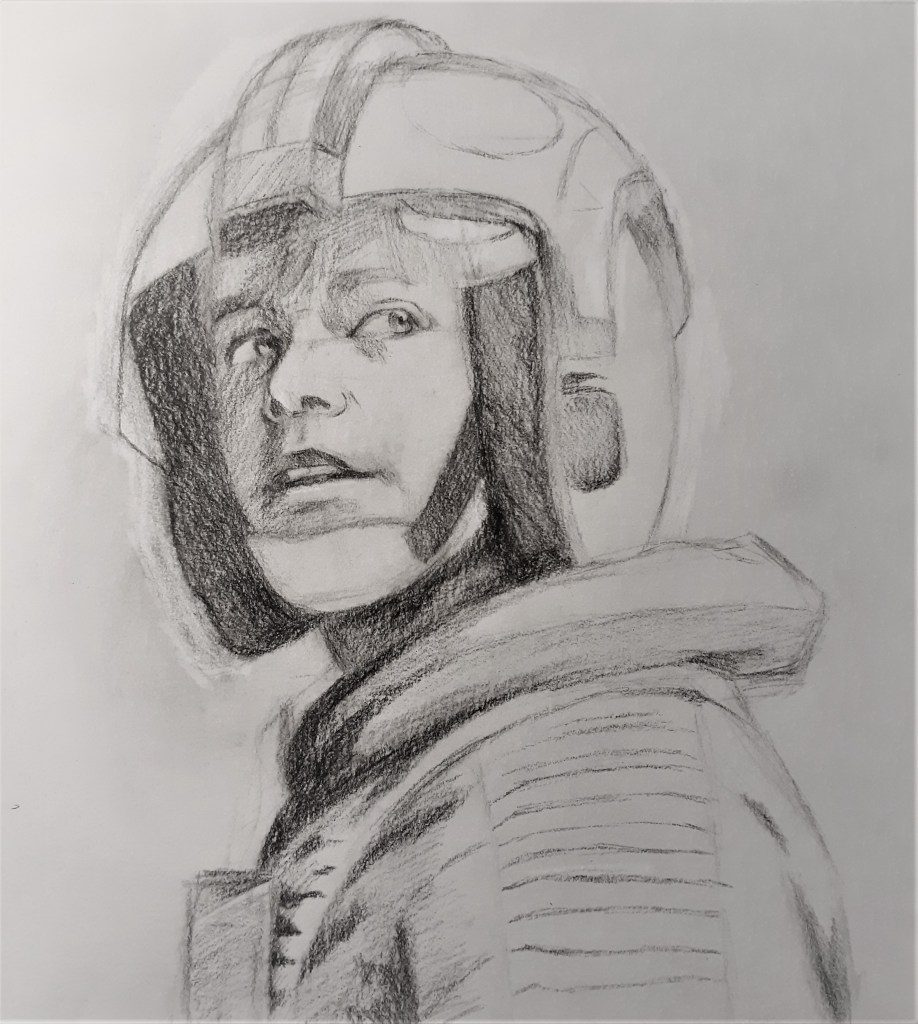
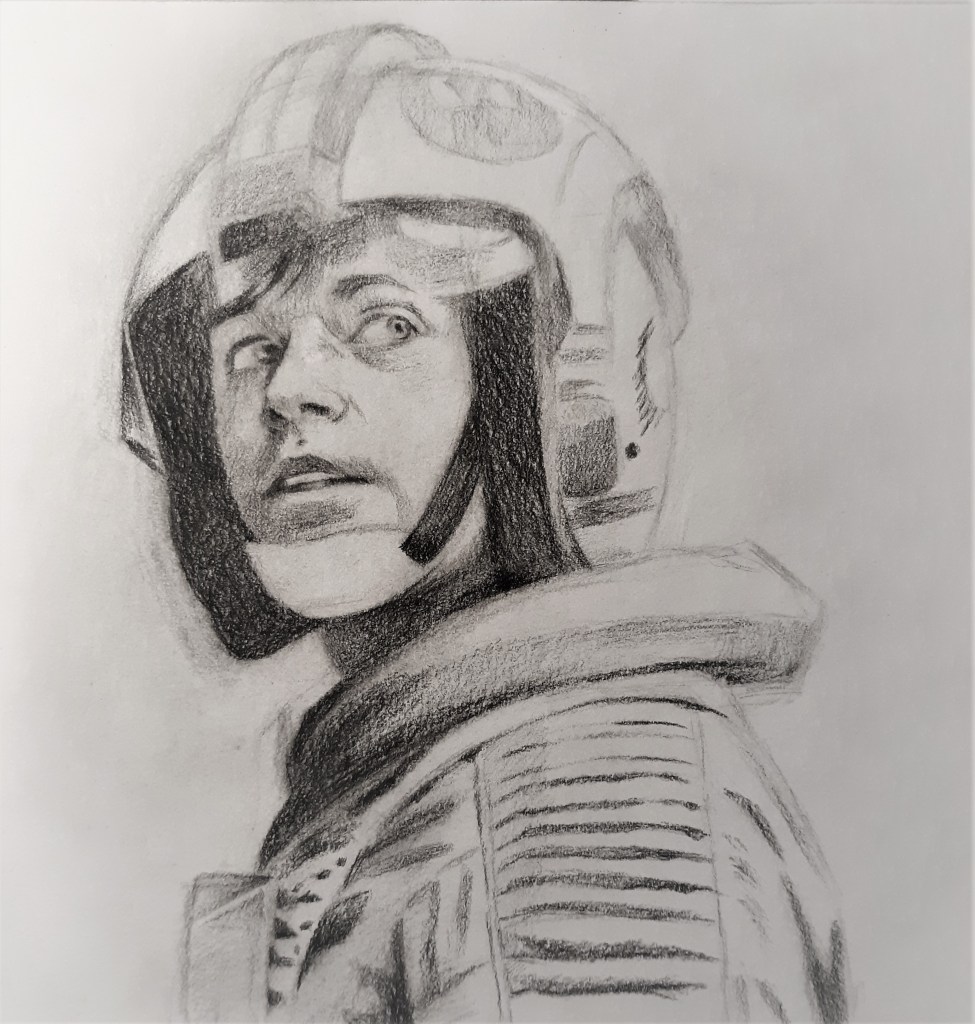
At this point, I’m just going over the whole piece and making sure all my tones are accurate to the reference. I think while getting into the details, it’s easy to get “tone blind.” I had to go over the suit a couple times to make sure it looked “orange”/grey and not white.
I also added the freckles on his face, and made some adjustments to the details on the helmet.
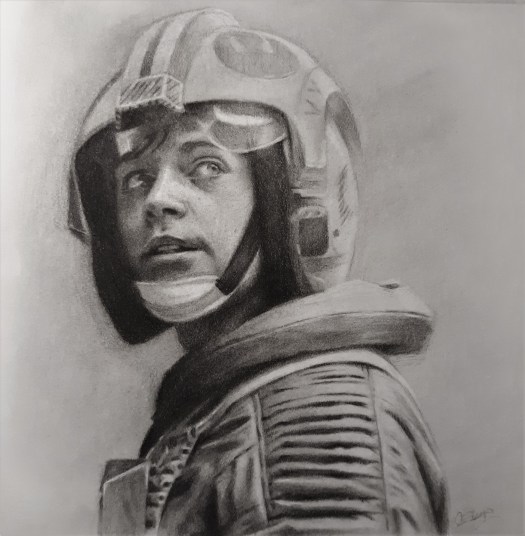
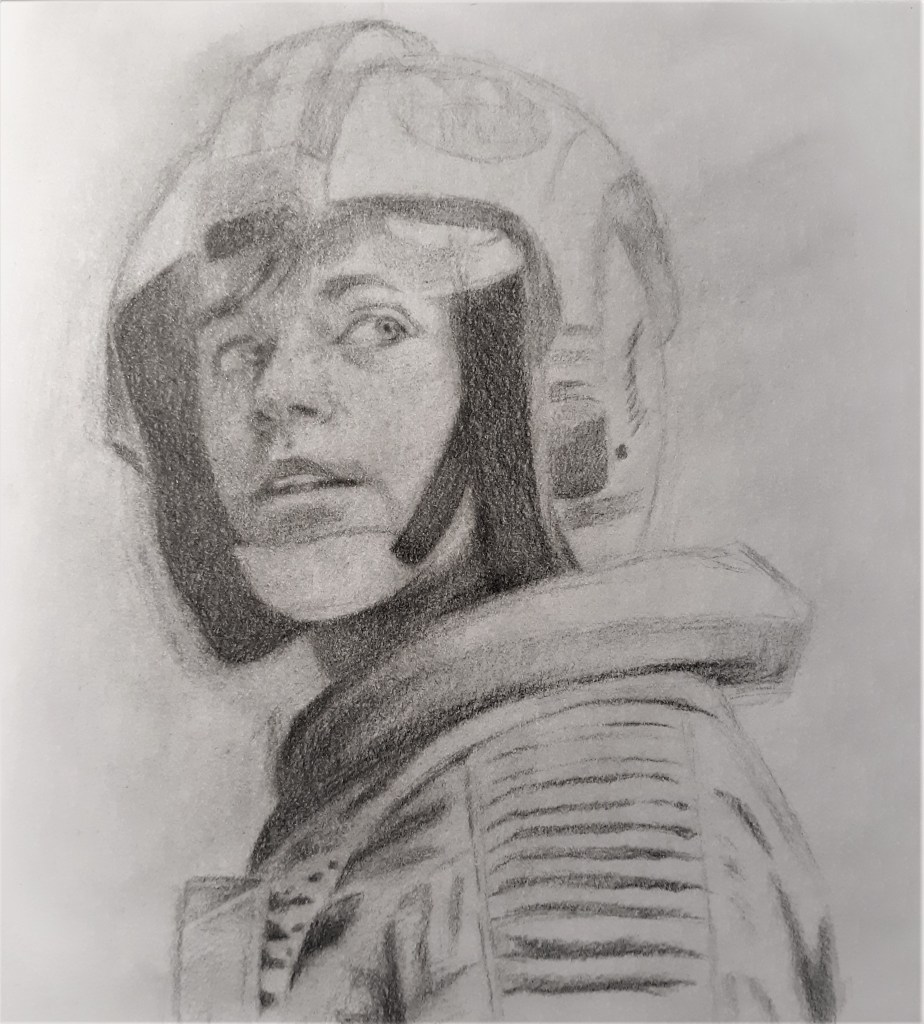
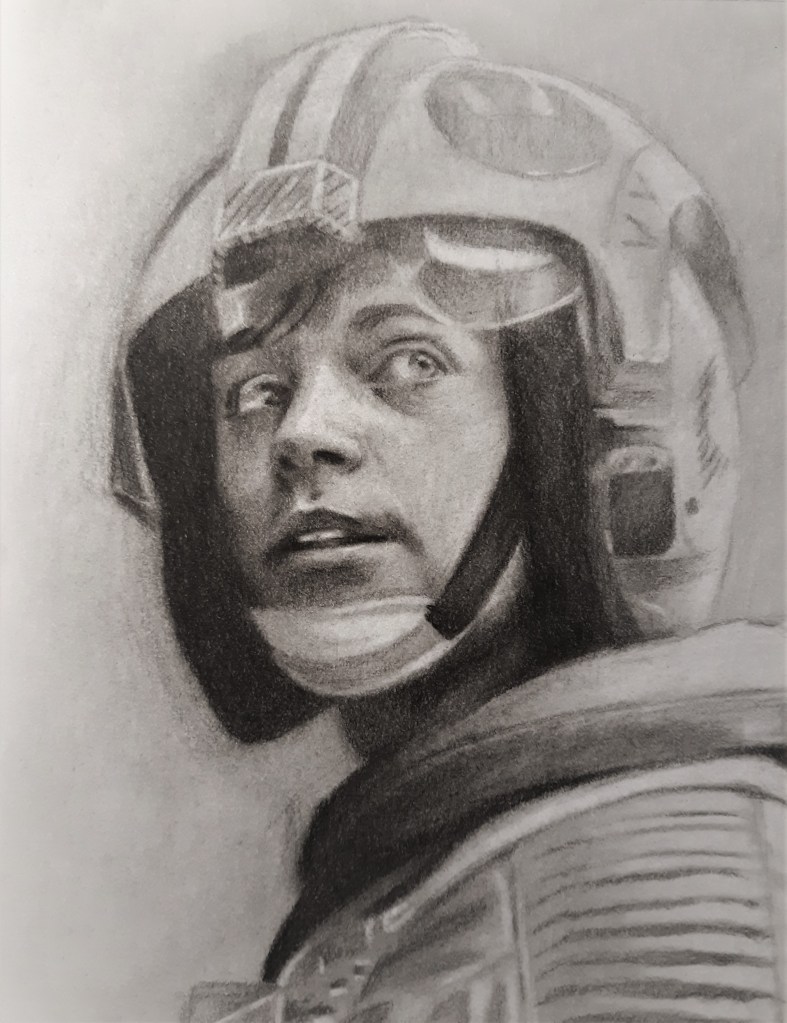
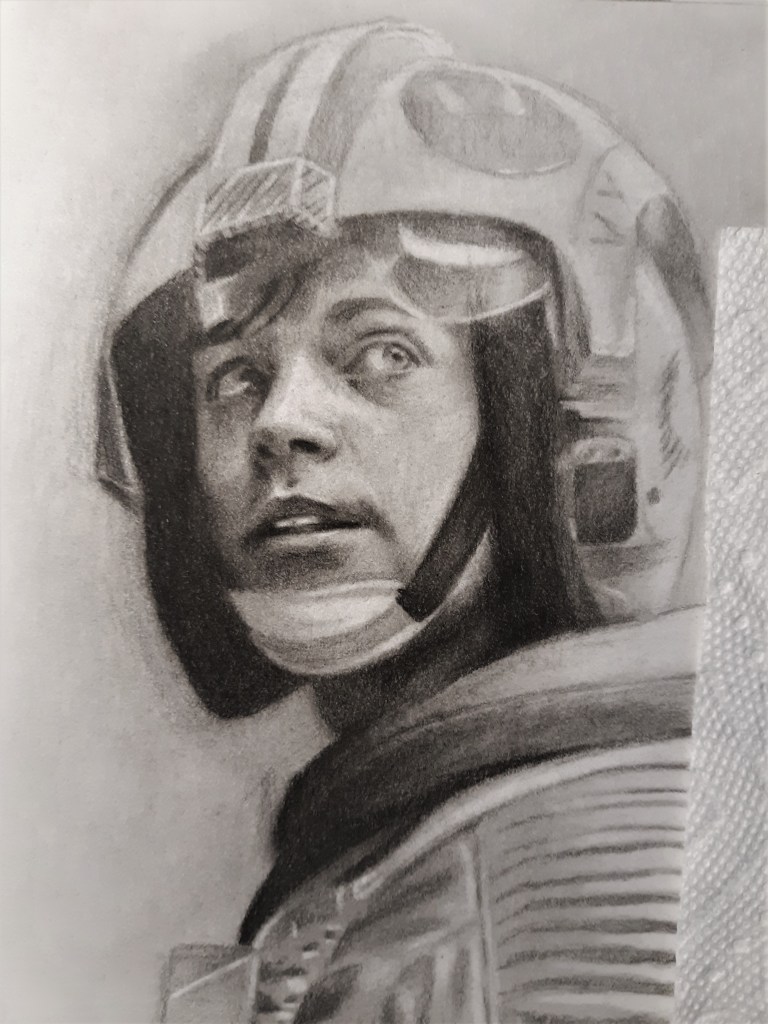
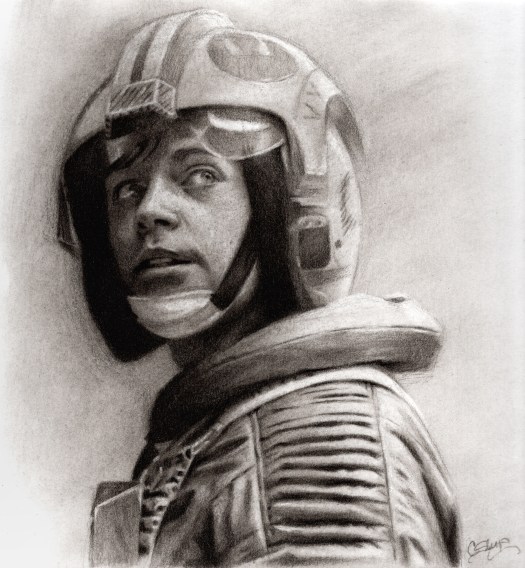
Aaand finally, we’re finished!
Mostly.
The last step of a charcoal drawing is to spray fixative over it. I know different artists have different preferences, and some people don’t like to fix their drawings, so I would encourage you to do some research, read up on the pros and cons and figure out what you want to do.
I personally don’t fix all my drawings, but since charcoal is so easily smudged, and I’ve had a few drawings become damaged that way, I’ve figured it’s better to be safe than sorry.
So I go over the drawing one last time, making sure everything is exactly the way I want it to be permanently, for the rest of all time. And yes, this stage is very obsessive, and panicky, and not a whole lot of fun. And I eventually have to stop myself, and say, “Okay, God, let this be for Your glory, even if it’s not Perfect™.”
Then I spray it with a few layers of Krylon Workable Fixatif, and finally scan it into the computer, because I like to have a digital copy as well.
And thus endeth our study in charcoal!
But the journey doesn’t have to end here. I highly encourage you to give charcoal and the “wipe-off” technique a try if you haven’t before. The best way to learn is from experience, and figuring out what works best for you through trial and error. 100% money back guarantee if you don’t fall in love with it. 😉
That’s all for now folks. I’ll be back again next time to talk about some advanced graphite shading tips.
Until then, Live Lionhearted.
~Chalice

Wow, I love your artwork! It looks great as always. I have done a few drawings with charcoal, but never the wiping off technique. I’m gonna have to try it now! 😀 I love this series, btw. Thanks for sharing! ❤
LikeLiked by 1 person
Thank you, Kyndal!! And you should definitely give the wipe-off technique a try sometime. You have my full support. 😉💛
I’m glad you’re enjoying the series! 😁
LikeLike
Amazing tutorial!
LikeLiked by 1 person
Thank you!! 😊
LikeLike
I’ve been wanting to try drawing with charcoal! This method looks so fun and satisfying! It was great to see the different steps of the piece. At first I was kinda unsure how it would turn out because of all the “wiping”, but then comes the details and highlights and tada! It’s a masterpiece! I’m excited to try out this method for myself!
LikeLiked by 1 person
Ahh, if you haven’t tried charcoal before, you definitely should!! It’s very much it’s own medium, and it is really satisfying and fun to work with! I would encourage you to give this method a try. 😉💛
LikeLiked by 1 person
Ah!!! It looks so life-like!
LikeLiked by 1 person
Aw, thank you, Lily!!
LikeLiked by 1 person