
A while ago, I had art block. Well, to be honest, I probably had plenty of art projects to work on, but I just wanted to do something that didn’t have to be perfect and I could just have fun with. I think I might have mentioned this to a friend, and she said I should draw a picture of Bucky and Steve. Well, that sounded like fun, and you know I love making art for my friends (and siblings 😜). So I took the request. I thought it would be fun to show you a little behind the scene of my drawing process.
Let’s go!!
The first step: Choose a reference photo.
So, after a bit of searching (okay, maybe a lot of searching), and agonizing, I finally settled on something… fairly simple.
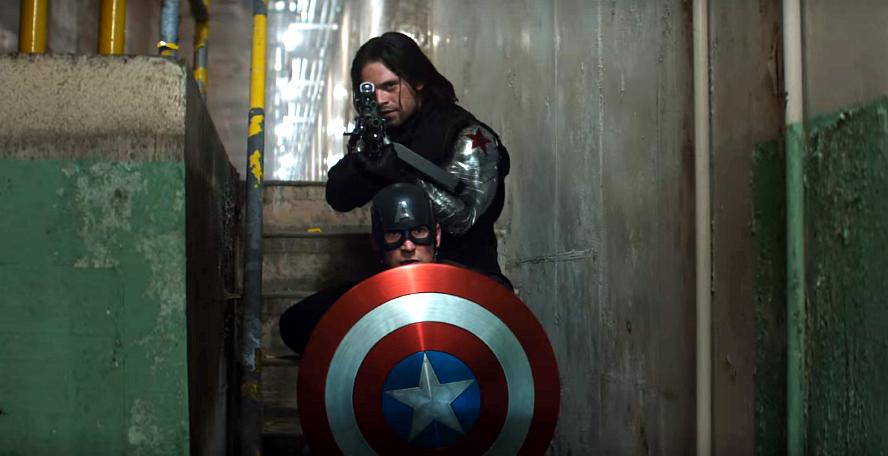
Hence the title of this post. (Okay, show of hands, who saw this coming?)
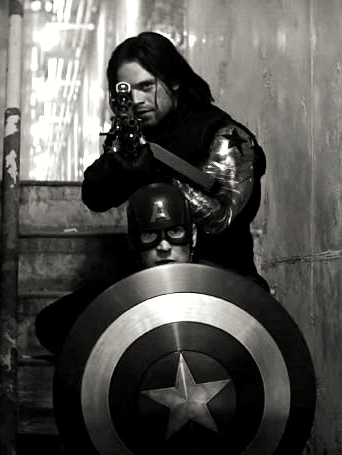
On to the next step: Crop reference photo and convert to black and white.
I always like to crop my photo to the size paper I’m using, that way I can see exactly how I want it to be placed. For this one, I was drawing on 9×12 paper, so I used the 3×4 crop. I also converted the picture to black and white so I can see the values better, and I adjusted the brightness/contrast a bit.
Alright, now it’s time to get drawing.
I took a bit of a different approach to this drawing. Instead of spending an hour creating a meticulously accurate outline, I just kind of roughed in the basic silhouette with a very large, very dirty blending stump. (The picture isn’t very high quality, I’m afraid, but you can kind of see my smudges there.) Then I sketched in the basic shapes. I tried to be careful in making my shapes accurate, but I wasn’t too worried about it.
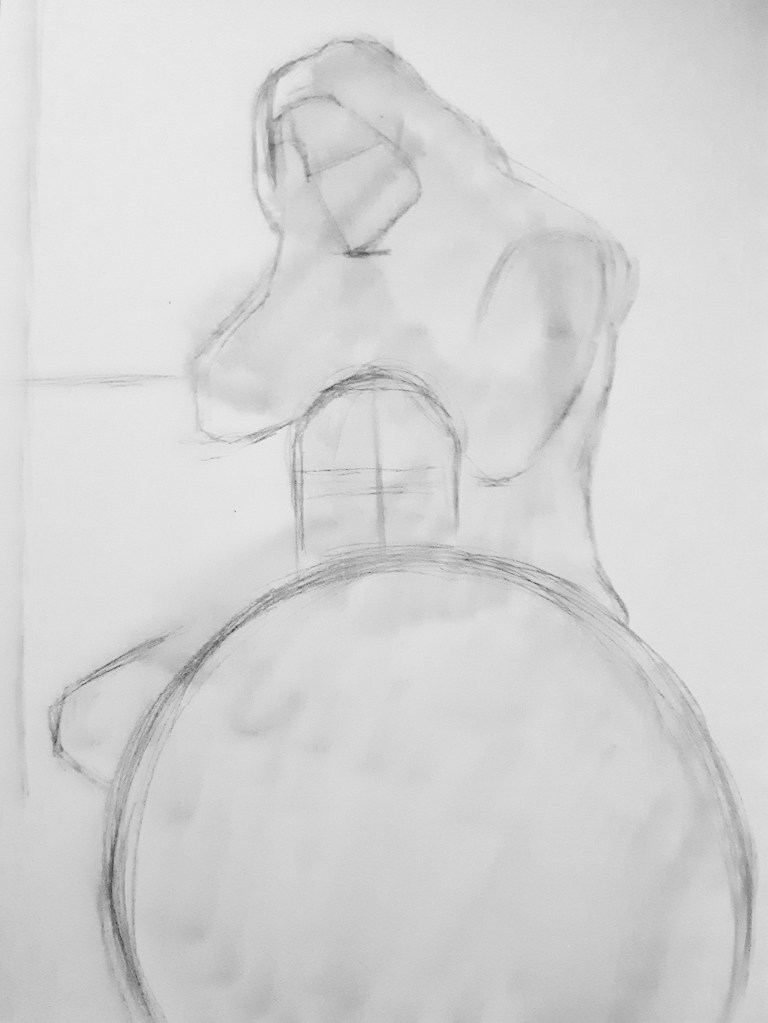
Then I went in and added the basic details. Nothing too fancy. Just enough to get me started.
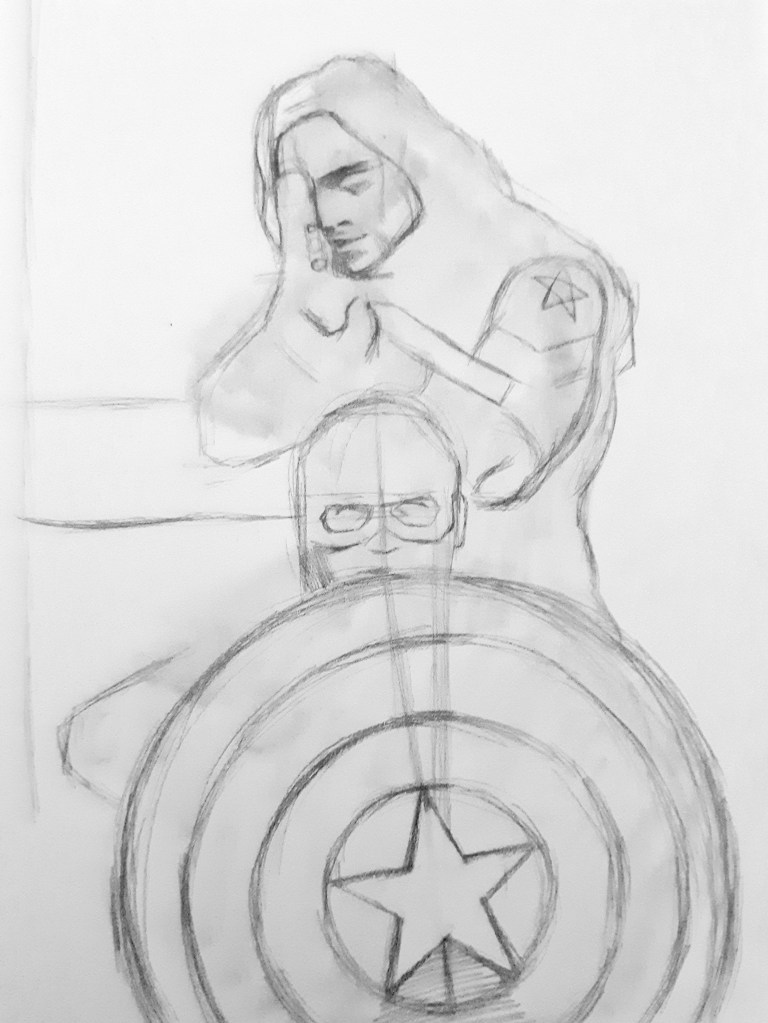
Let me just say, stars are not easy to draw.
Now, I don’t normally do this, but I decided do this drawing in a more painterly manner, and block in my tones before I did any details. So I looked at my reference and picked out the darkest tones first.
Then with my mechanical pencil filled with 2B lead, and my huge blending stump still handy, I filled those areas in.
If I really want to get something dark, I’ll do a layer of filling it in with heavy pressure, and then blend out it. And then another heavy layer, and blend it out again, and so on. For this drawing though, I knew I was going to have to lift out highlights and details, and once you get those layers down, it’s pretty hard to lift ’em back up. So I left it at one layer for now.
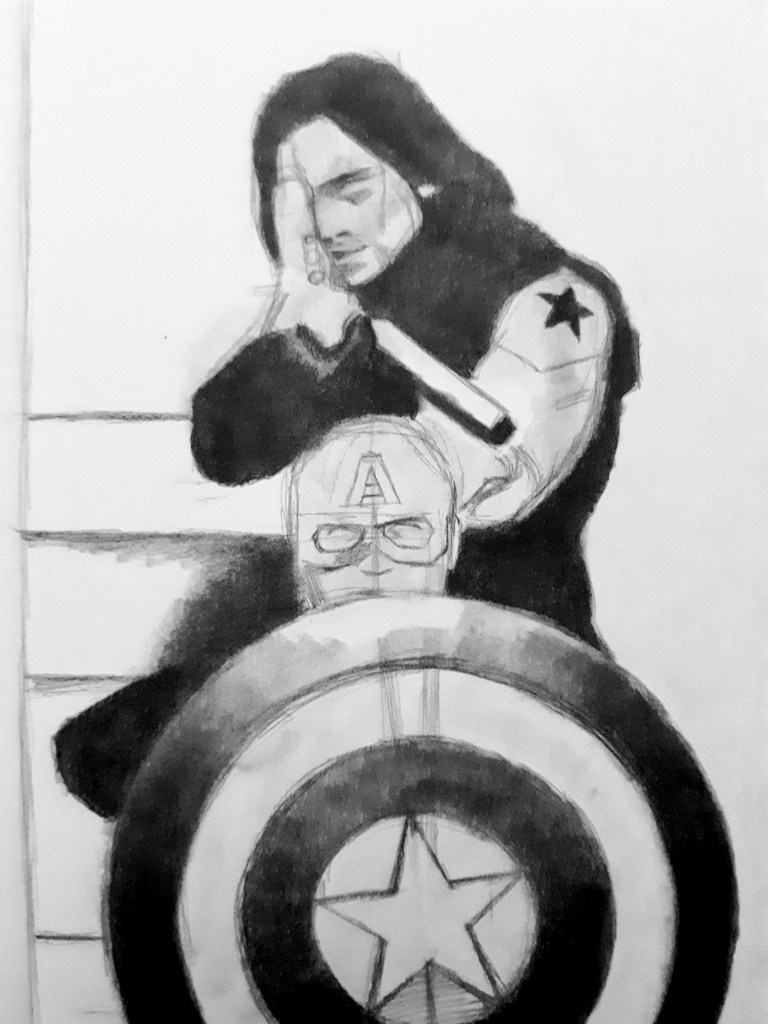
And with, not so heavy pressure, and the same blending stump, I added the midtones.

Since the white of the paper accounts for the whites and highlights, I’m done with my blocking in. It’s now time for my favorite part.
Details!

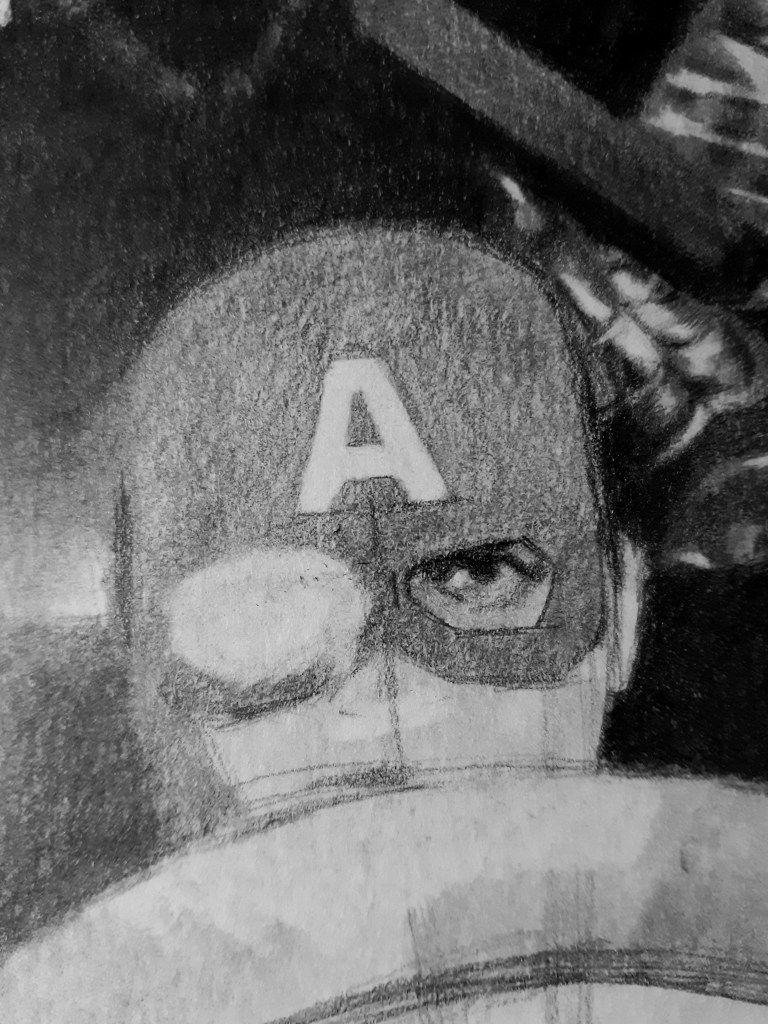
For this particular drawing, I started at the top and then worked my way down, and then put in the background. It wasn’t long before I ran across my old nemesis.
The Misplaced Eye.
Y’all, I do this so often—drawing an eye too far one way or the other—but somehow I still find it funny. I didn’t take a picture before, but I here’s what it looked like after I took the old eraser to it.
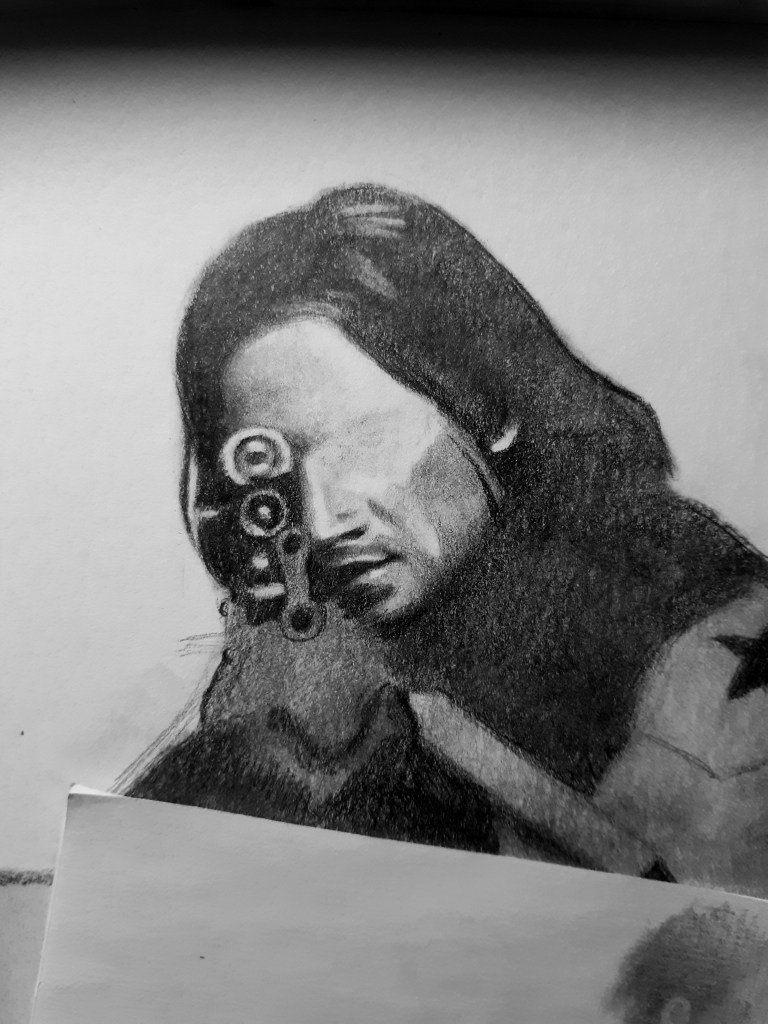
You can still see the ghost of The Misplaced Eye there.
So, I fixed that, and then started building up those dark layers I mentioned earlier.
But then… You won’t believe it…. You would have thought I had learned my lesson. I guess not because,
IT HAPPENED AGAIN!
And again, I forgot to take a before picture, but there’s one-eyed Steve Rogers for ya.
Me re-drawing eyes at this point:

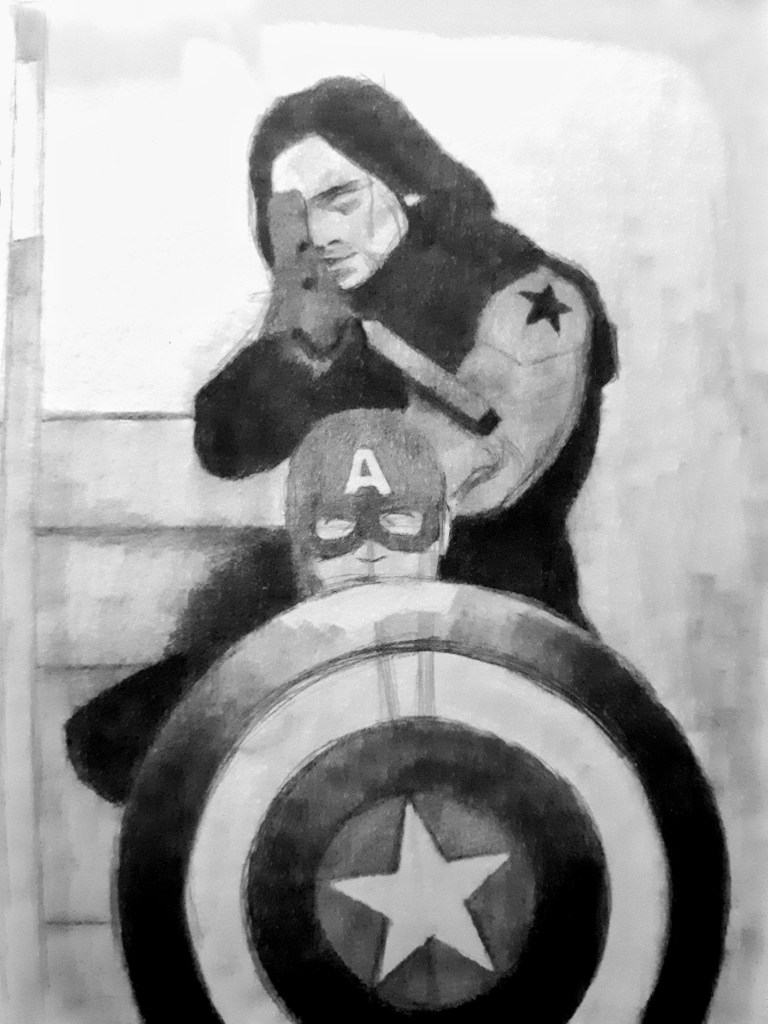
Okay, now, you must be warned. Something happed when I got to the rest of Steve’s face. I realized that since he’s behind the shield, it would probably be better to draw his face after I did the shield. In the mean time, this happened…
And yes… I left it like that until I had finished the background and everything else.
I don’t know what’s wrong with me.

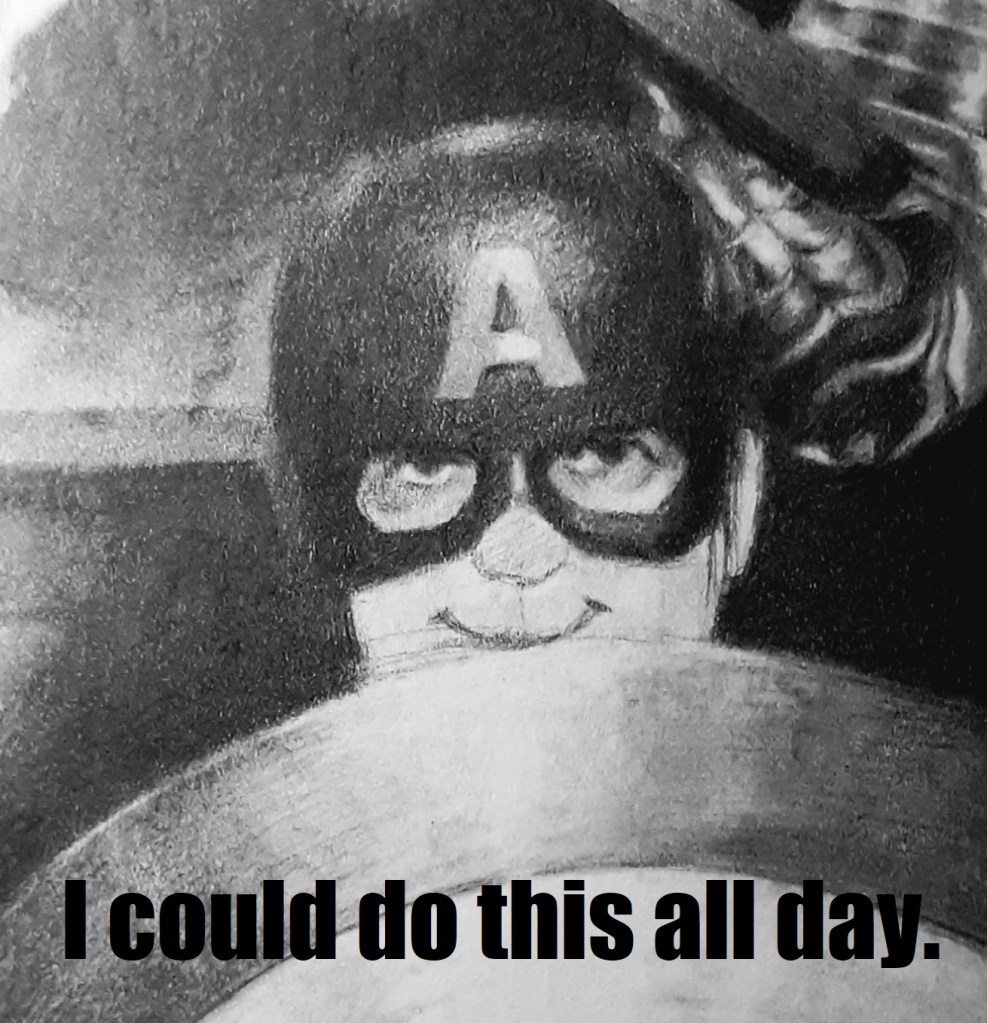
It was actually kind of hilarious when I showed it to my older brother, because at first he didn’t even realize anything was amiss.
…and then he did. We couldn’t stop laughing.

Okay, okay. Maybe you don’t find my little jokes amusing. I’m sorry.
Kind of.
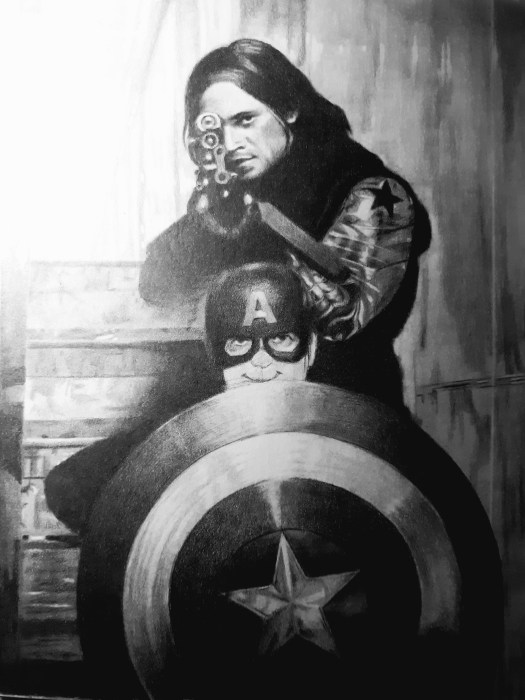
So the last step was to finish Steve’s face properly, which was a little harder than I expected. But after a bit of tweaking, I think I got it.
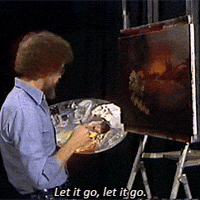
Bonus step (optional): Sit back and obsess over all the flaws. Make note of all the things I could have done better. Then let ’em go.
Because you know, I think there comes a point where that’s just not a good thing to do. 😝 And perfectionist aside, I’m happy with how it turned out.
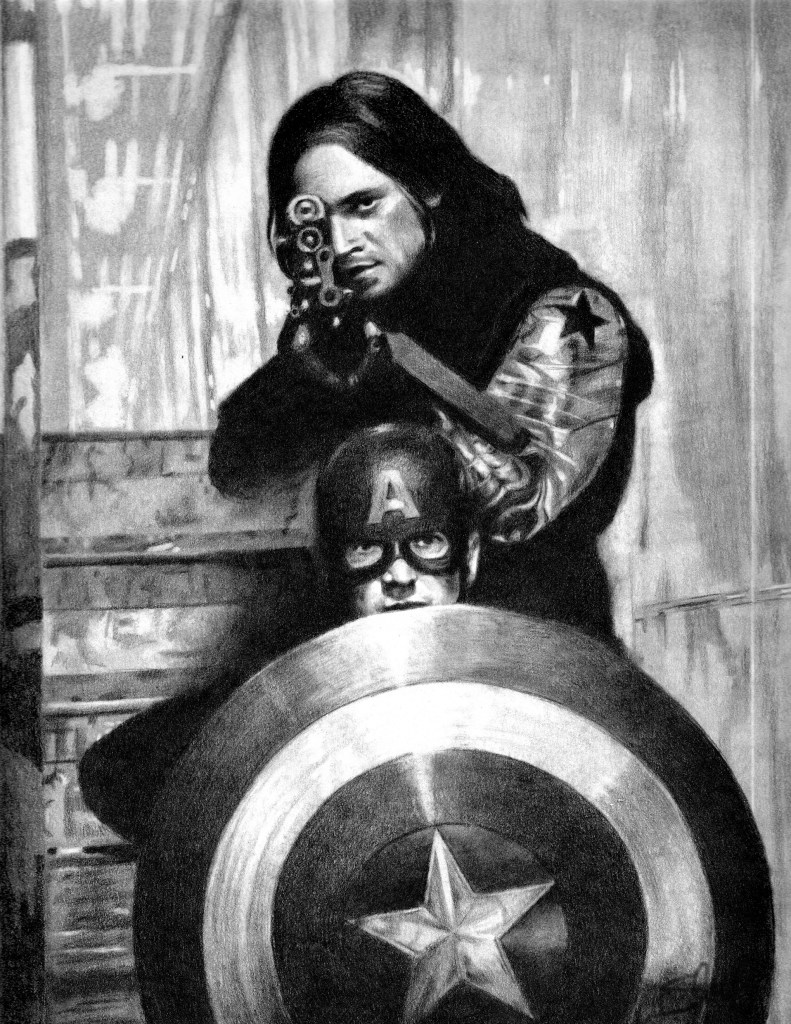
Alright, friends. I hope you enjoyed this glimpse into my process for this drawing of two buddies in a scary staircase. 😊 Let me know in the comments if you would you like to see more progress posts like this. Or if you have an idea for something I should draw (I may refer back to this, when I get blocked again 😉). Or if you just want to chat. You know, I’m here. 🙂
Until next time, stay lionhearted!
Love,
Chalice

*fangirls* Huge thumbs-up from me!! ❤
LikeLiked by 1 person
Aw, thank you!! 💛
LikeLiked by 1 person
Chalice…I almost spat out my coffee when I saw Captain America’s FACE. 😂 😂 I’m dying right now.
(I honestly just love reading your posts lol. The drawing looks AMAZING by the way!!!)
LikeLiked by 1 person
I just sent your post to all three of my older sisters and they also died laughing 😂
LikeLiked by 1 person
Mission accomplished! Mwahahaha! 😂😂
Thank you, Mary!! 😁
LikeLiked by 1 person
WOW that is a fantastic portrait!!! 😀 I really enjoyed seeing it come together in stages.
And Steve’s face made me crack up so hard. 🤣 🤣
LikeLiked by 1 person
Thank you so much, Elisha!! 💛
Haha, and I’m glad you appreciated my weird sense of humor. 😂
LikeLiked by 1 person
I wish I could have been there when you showed it to our brother. I wonder if I wouldn’t have noticed it either. I bet y’all had a really good laugh!
It’s great to see your process. It’s encouraging when you show yourself fixing the mistakes. It reminds me that anything worthwhile is a process and that it doesn’t always come together perfectly the first time, but to keep at it until it’s good.
LikeLike
I wish you could have been there too! It was pretty funny! 😂
Aw, thank you! It’s encouraging to me that you found this encouraging. 😁 That (and sharing laughter 😉) is what it’s all about for me. 💛
LikeLike
Oh my goodness this is fantastic. I laughed as soon as I saw Steve’s first face 😂😂 Perfect 👌🏼
LikeLiked by 1 person
Thank you so much, Evelyn!! 😂💛
LikeLike
Your rough outlines are better than my stick figures! 😛
Thank you for sharing–it was interesting to see your process, and yes, more posts like this would be fun. The end result was awesome, but I do love Cap’s original smile. 🙂
As a side note, I love the Bob Ross quote. Kyndal is the only one who paints in our family, but we all love watching him for his relaxing encouragement. 🙂
LikeLiked by 1 person
Aw, I don’t know ’bout dat! I’ve seen some of your art and it’s pretty great. 😊👌
Haha, thank you! I have to say I was a little torn there at the end, especially since a couple of my siblings were saying I should just leave Cap’s smile, hehe. But no. That wasn’t happening. 😂
And, yes!! Bob Ross is awesome. I love his videos. 😁
LikeLike
YAAASSS!!! The details in the shading! This drawing is definitely a success, Chalice. Also, this is one of my favorite parts in the film, so yes again! XD
LikeLiked by 1 person
Aw, thanks, Kyndal! 💛 I’m so glad you like it! 😊
LikeLike
Oh my goodness! This made me laugh so hard then sit back in stunned silence. It is incredible! Thanks for sharing your process!
LikeLike
Thank you so much!! 😊💛
LikeLike
Great job, Chalice!
LikeLike
Thank you, Katherine!!
LikeLike
Awesome job, Chalice!! (Also I am dying over here about Captain America’s face 😂🤣)
LikeLike
Haha, thank you, Faith!! I definitely had too much fun with that one. 😂
LikeLiked by 1 person